Quick Start
This page keeps only the fastest path. For the fuller deployment trade-offs, see Deployment.
Option 1: Unzip and Run on Windows (Most Users)
Windows users should start here. No need to understand Docker, terminals or service deployment.
Step 1: Download
Open the GitHub Releases page and, under the Assets of a full Release, download the archive named exactly neuro-book-windows-x64.zip.
Do not download packages with Source or Product overlay in the name; those are for developers.
Step 2: Unzip
Extract into a new, empty directory such as D:\NeuroBook. Do not extract to the desktop or the root of your system drive.
Step 3: Start it
Double-click Start Neuro Book.cmd inside that directory. A black command-line window will open — this is normal, do not close it. That window is the service itself; close it and the app stops.
Step 4: Open the interface
Type this into your browser's address bar:
http://localhost:3000The first launch initializes the data/ directory automatically — your work, configuration and logs all live in there. The Windows portable build needs no password by default; it works straight away.
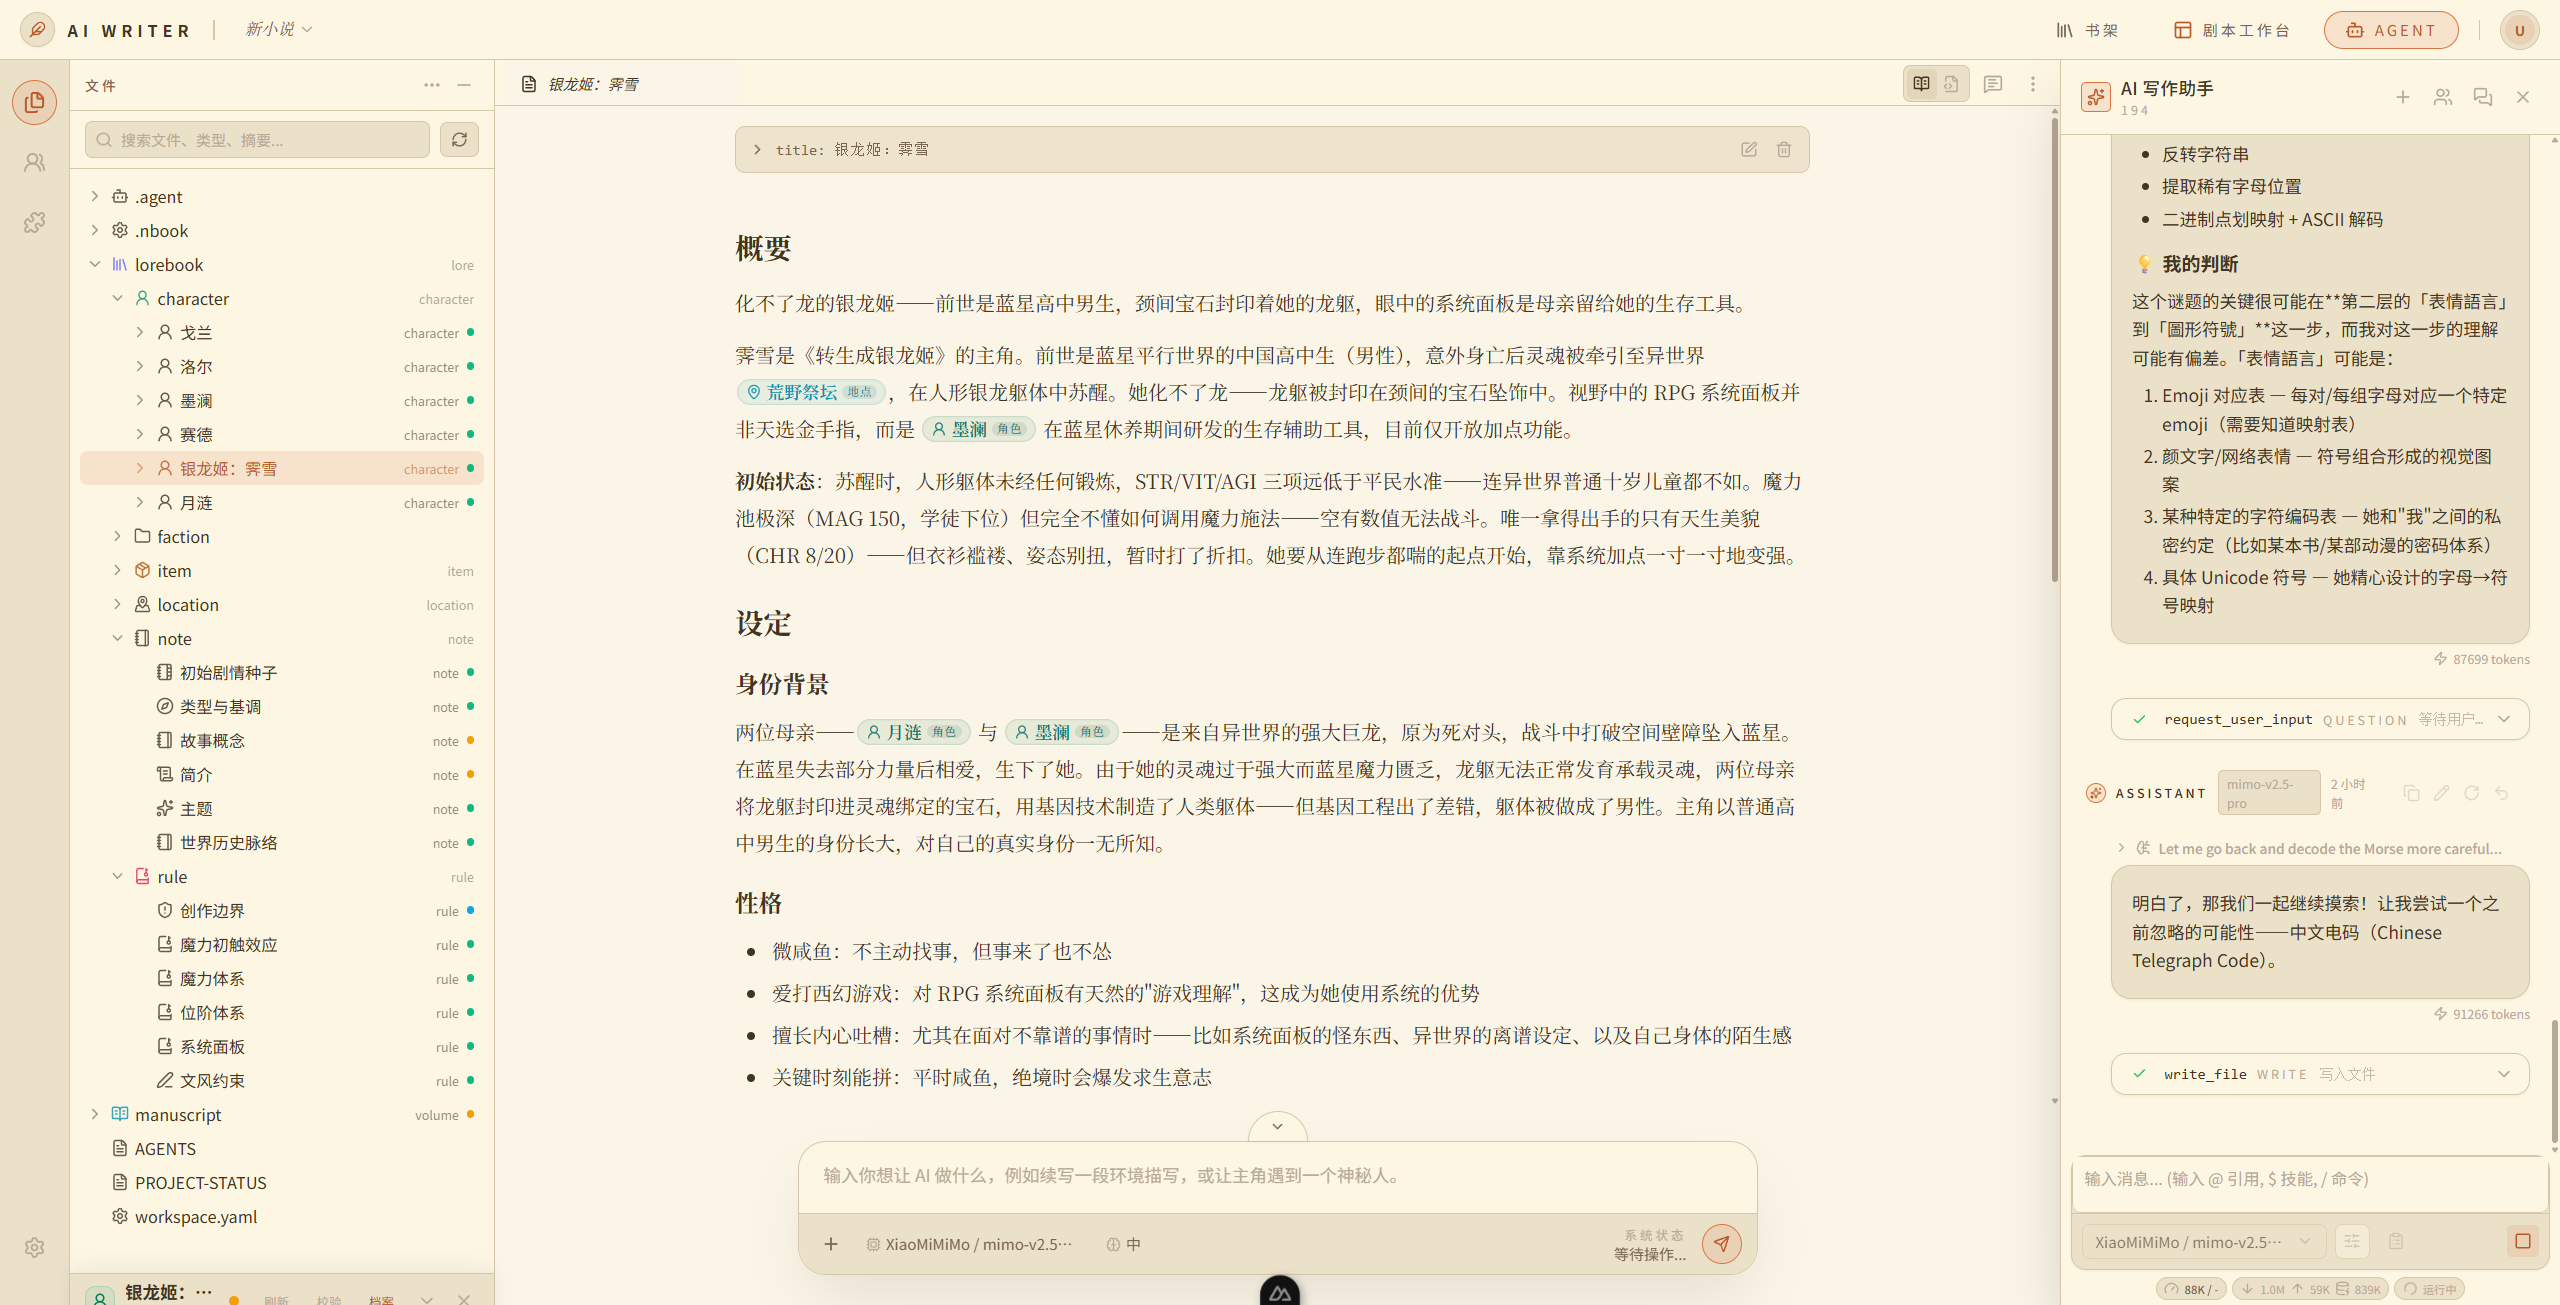
Step 5: Configure an AI model
Skip this and none of the AI features work. See Configure an AI Model below.
Updating
Do not overwrite the old directory with a new zip — you will lose your configuration. Update with Update Neuro Book.cmd in the extracted directory, and everything under data/ is preserved.
If You Want Password Protection
If other people can get at this machine, double-click Create Admin.cmd and follow the prompts for a username and password to turn on login.
Option 2: NeuroBook Manager (Servers / Multiple Instances)
On a server, prefer the GHCR container; on a machine that already has Bun, Product Bun or a Source Profile also work.
bunx --bun @notnotype/neuro-book-manager@canary install --profile ghcrDuring the canary phase always use @canary; do not switch to @latest before the stable release. Do not write bunx run @notnotype/... either — that resolves the package name as a local script and the Manager will not start.
With no arguments it enters an interactive wizard. Piped execution and automated environments have no TTY, so the arguments must be explicit:
bunx --bun @notnotype/neuro-book-manager@canary install --profile ghcr --dir /opt/neuro-book --port 3000 --yesOnce installed, go to the Installation Root and start it:
.runtime/bin/neuro-book startIt listens on port 3000 by default. Use neuro-book update / status / doctor for updates, status and diagnostics. For how to stop the service, how to start it at boot and how to put it behind a reverse proxy, see Running, Data and Privacy.
Server Profiles turn on login authentication by default, so create an admin after installing:
neuro-book admin createAuth Defaults Differ by Profile
Windows Portable has password protection off by default; every other Profile (GHCR, Product Bun, the Source family) has it on by default. You can set it explicitly with --auth enabled|disabled.
Configure an AI Model
NeuroBook provides no AI of its own; it calls the model provider you configure — the vendor that serves the large-model API. You get an API key from that vendor and put it into NeuroBook.
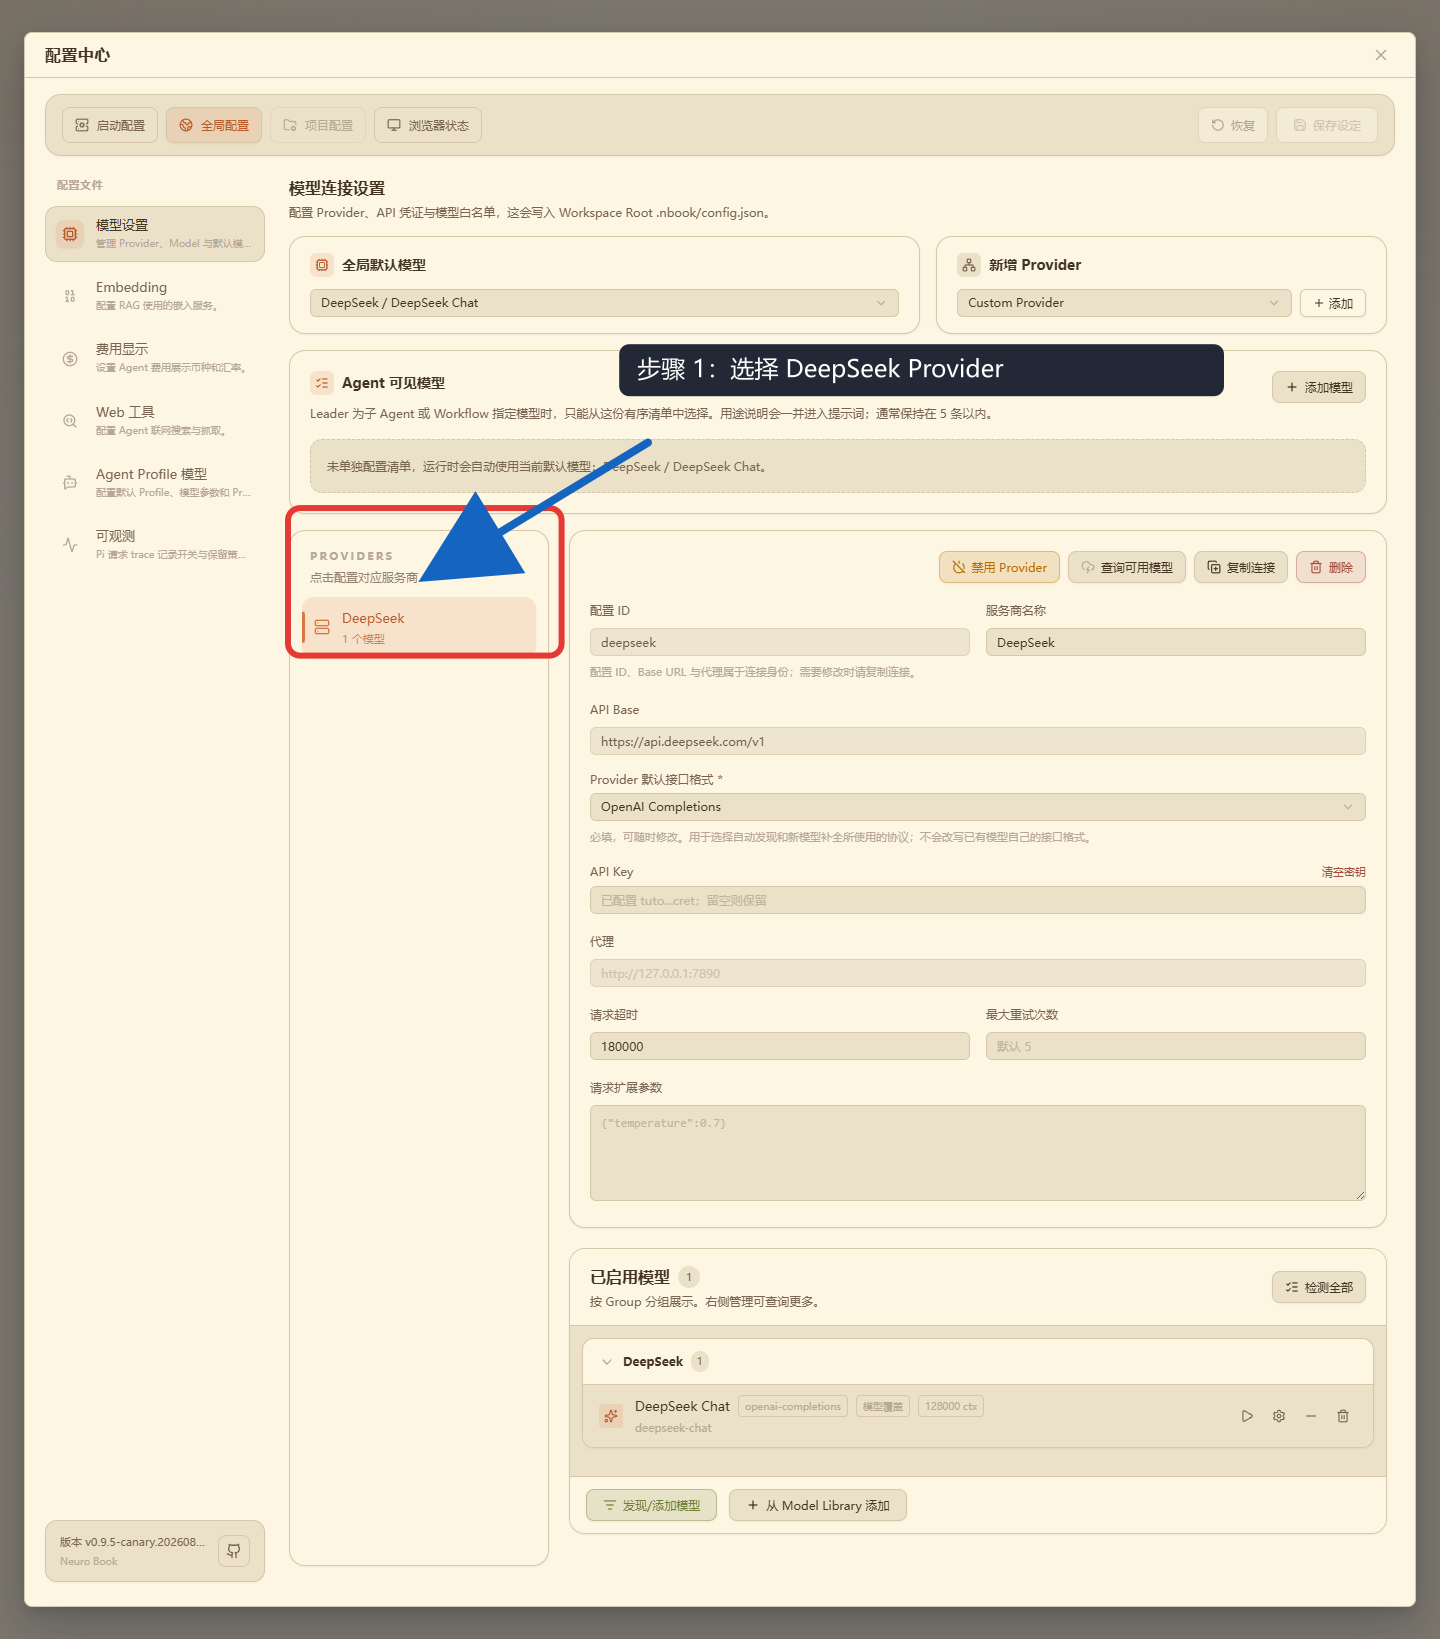
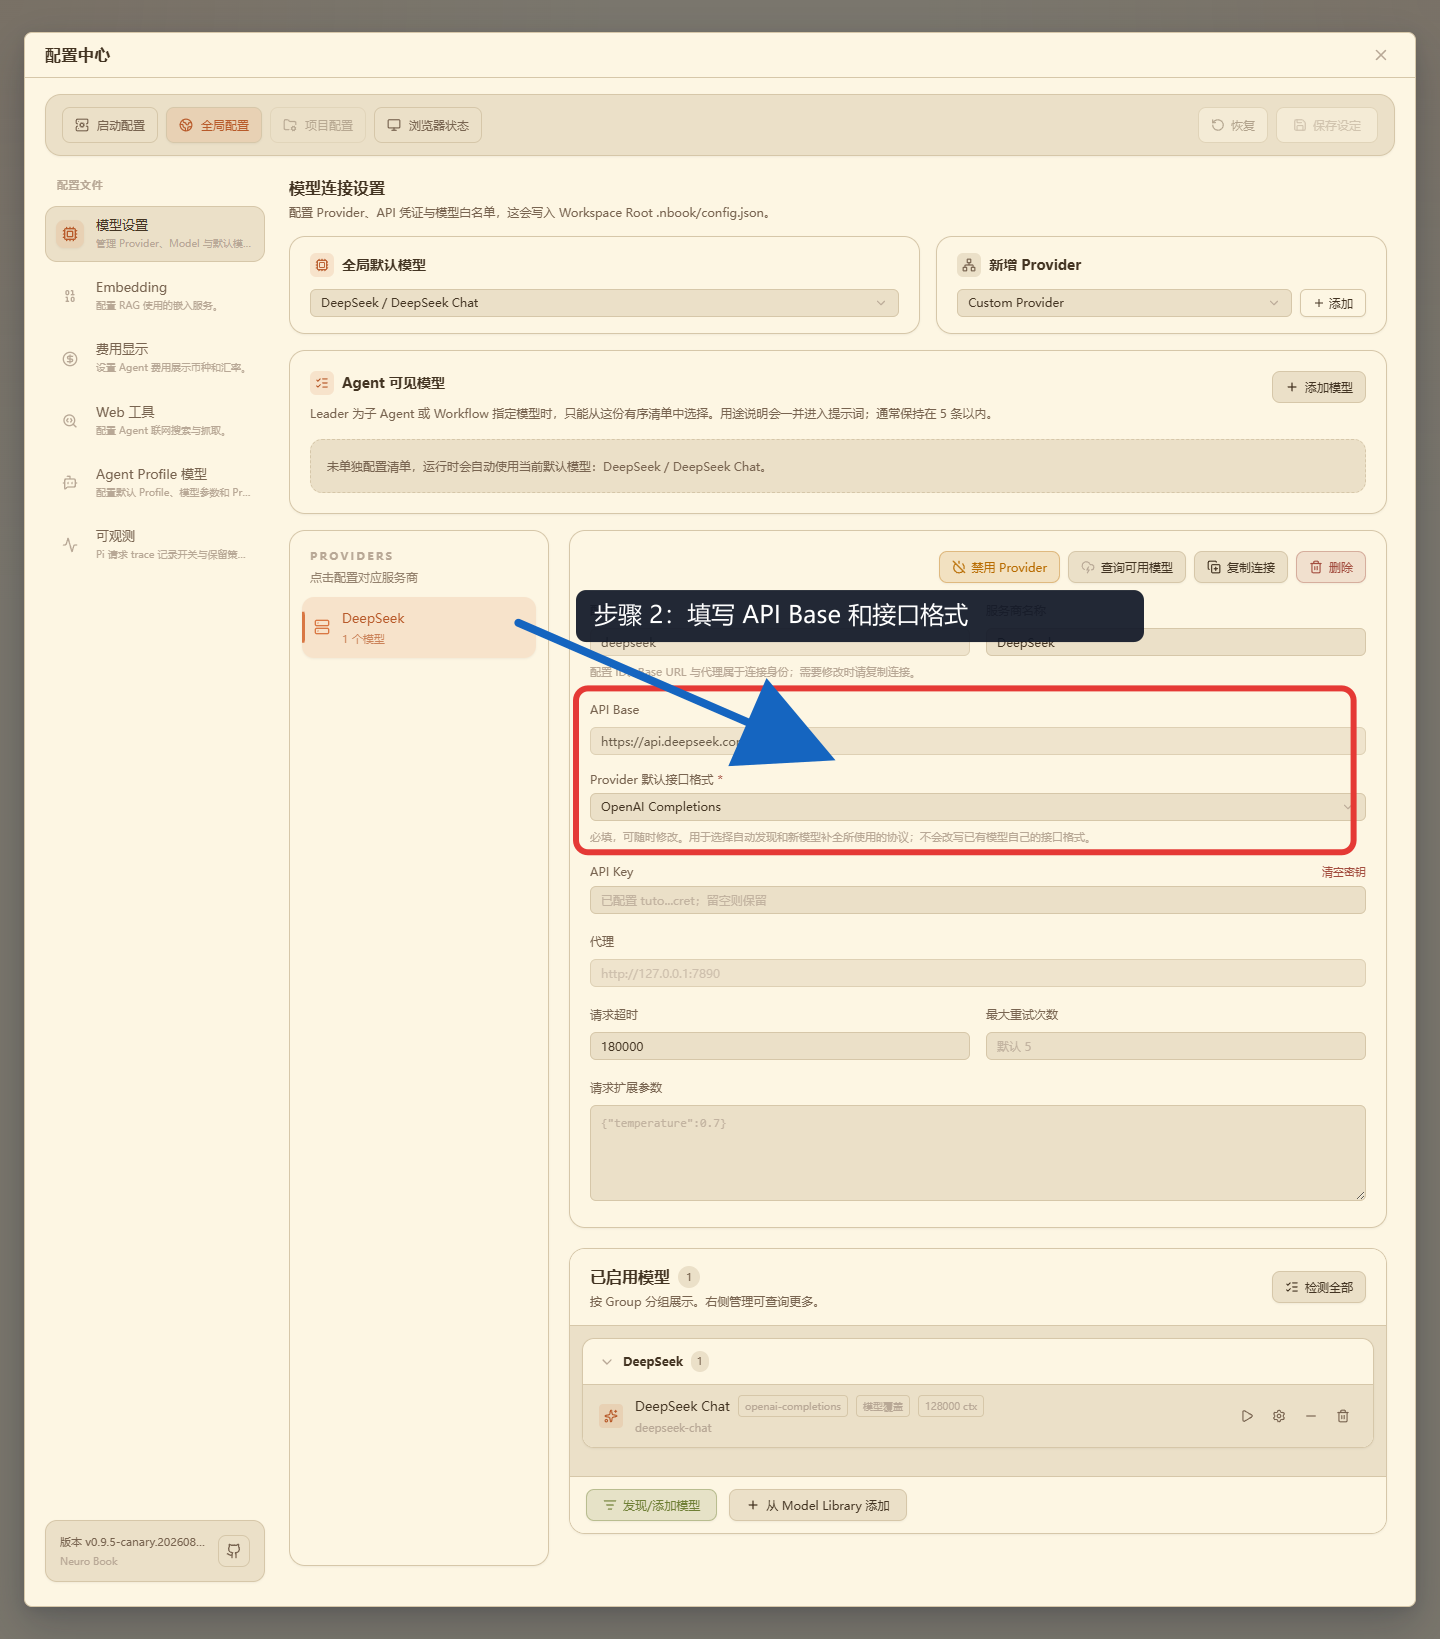
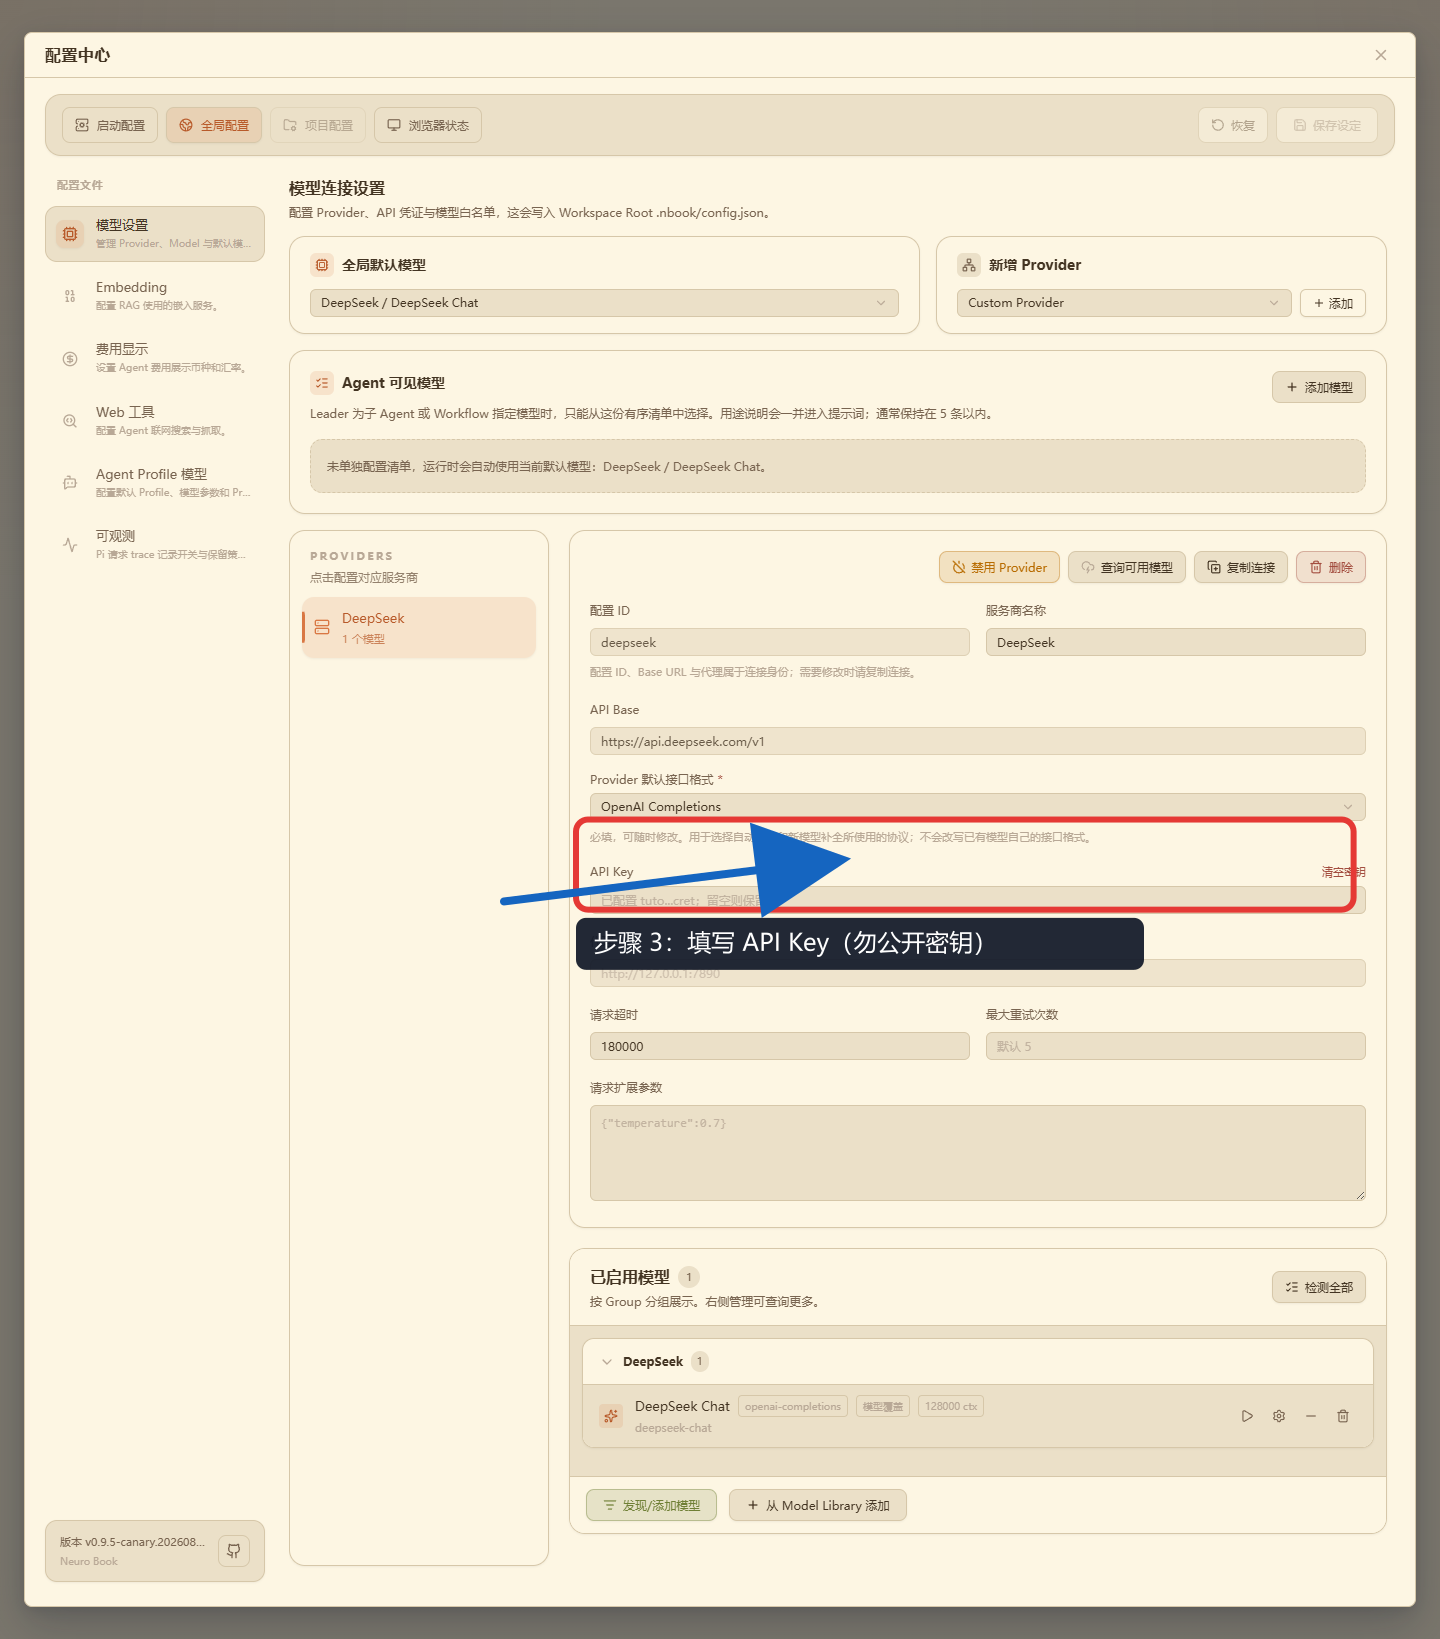
After launching, go to Settings → Models and complete the fields in this order: choose the provider, fill in the API Base and API format, enter the API key, then confirm the model entry. Each step has its own annotated image:
- Choose the provider:
- Fill in the API Base and format:
- Enter the API key:
- Confirm the model entry:

The tutorial images show only a redacted placeholder; never put a real API key in chat, screenshots or the repository. The same page also lets you assign a model per Agent — a stronger model for writer, who writes the prose, and a cheap one for summaries.
On cost: NeuroBook itself is free and open source. What costs money is the model calls, priced by the vendor you picked and billed directly by them. NeuroBook meters the tokens of every call broken out by input / output / cache write / cache hit and converts them into USD and CNY, so "what did this chapter cost" has an exact answer.
On privacy: what you send to the Agent, prose and worldbuilding included, goes to the provider you configured yourself and passes through no NeuroBook server. For the full data flow, where sensitive local files sit and what to check before you share anything, see Running, Data and Privacy.
Long-lived configuration is stored in the Global Config:
<State Root>/workspace/.nbook/config.jsonState Root defaults to the installation directory; on the Windows portable build it is data/ under the installation directory, so the real path is data\workspace\.nbook\config.json. This file is local runtime state and does not go into Git.
Common Next Steps
- The app is running and you want to start your first book: read From Your First Book to Chapter Three.
- You want the differences between Windows, Docker, Product Bun and the Source Profiles: read Deployment.
- You want to know where the data lives, how to back it up and how to stop the service: read Running, Data and Privacy.
- You want AI help with deployment or troubleshooting: hand it the Operator Bridge.